
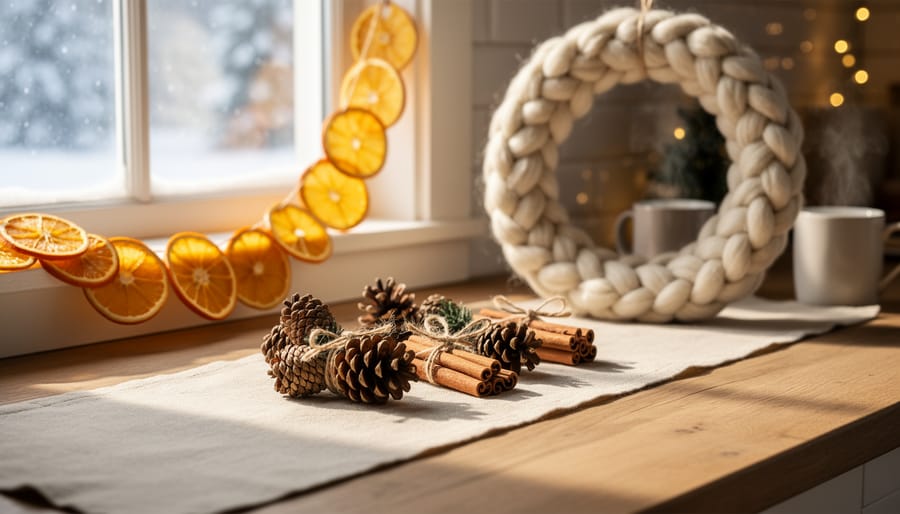
The best seasonal crafts are the ones you can finish in an afternoon with supplies you already own or can grab for a few dollars. Think dried orange garlands drying on a sunny sill, pinecone and cinnamon stick bundles on the table, or a chunky yarn wreath that hangs on your door without a single nail. Most of the eight projects below take one to three hours, and none of them ask for special skills, just a little patience and a willingness to get your hands busy.
What makes these ideas work is that each one pays you back in the senses. Citrus and cinnamon fill the kitchen with warm scent. Soft felt and thick yarn feel wonderful to handle. Salt dough ornaments become keepsakes the whole family can sign and date.
Some are perfect for renters, some are gentle enough for little hands, and a few double as thoughtful gifts. We’ve picked projects for every kind of home and every skill level, so you can choose what fits your space and your week, then start making something you’ll be proud to put on display.
How We Picked These Seasonal Craft Projects
This is a curated list, not a lab report, so I haven’t put every project through hands-on testing. Instead, I chose ideas that I’d be happy to see on a real mantel, in a real kitchen, in a home that gets lived in. Each one had to clear a few simple bars, and if you like a budget-friendly DIY as much as I do, you’ll feel right at home with them:
- Beginner-friendly steps anyone can follow, no special skills needed.
- Budget-friendly supplies you can find at a grocery store, craft shop, or on a walk outside.
- Renter-friendly decor that hangs or sits without damaging walls or doors.
- Family-friendly projects that little hands can safely help with.
- Finished in one afternoon, or less.
The result is a mix that suits different skill levels and households. Whether you’re a first-timer in a small apartment, a parent looking for a rainy-day activity, or someone who simply loves a cozy weekend project, there’s something here for you. Every finished piece should look good once it’s out of the craft area and into your living space.
1. Dried Orange Garland, a Citrusy Kitchen Classic
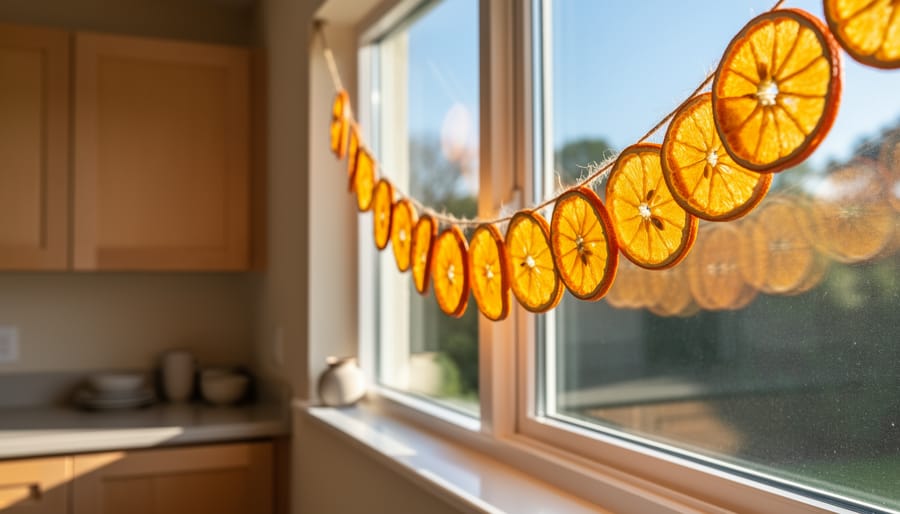
Few crafts smell as good as this one. As orange rounds dry in a low oven, warm citrus drifts through the whole kitchen, and once they’re strung up, the slices glow like tiny stained-glass windows when sunlight hits them. It’s a kitchen project and a craft in one, so it’s a natural fit if you already love time spent at the stove.
Supplies: 2 to 3 oranges, a sharp knife or mandoline, parchment paper, a baking sheet, a darning needle, and about 6 feet of twine.
Time: About 15 minutes of prep and 3 to 4 hours of baking at 200°F, so it’s perfect for a slow afternoon.
Slice the oranges thinly, pat each round dry with a towel, and lay them in a single layer on the lined sheet. Bake until they feel dry and slightly curled, then let them cool completely. Thread the needle with twine, pass it through each slice, and tie a knot between rounds so they stay put. Drape the finished garland over a window, mantel, or open shelf.
Once cooled, check that the slices feel fully dry before hanging them, since any lingering moisture can cause spotting.
2. Pinecone and Cinnamon Stick Bundles, a Foraged Centerpiece
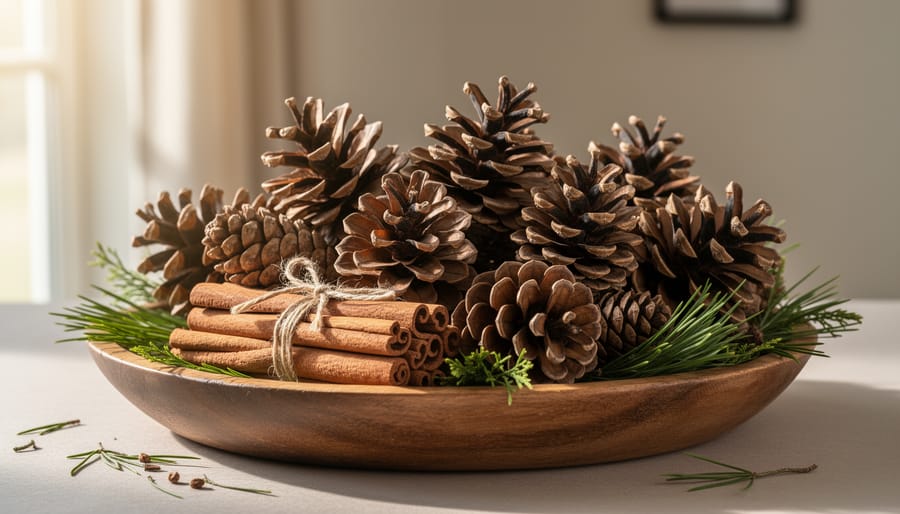
Next time you’re out walking, bring a tote bag and keep an eye on the ground beneath evergreens. Pinecones turn up everywhere once you start looking, and a handful or two is plenty. Shake each one out to dislodge any bugs, then let them dry on a baking sheet in a low oven for about 30 minutes so they open fully.
Gather three or four pinecones with two or three cinnamon sticks, wrap them with a length of ribbon, and tie a snug bow. Make a few bundles, then nestle them in a wooden bowl or tray on your dining table or entryway console. A light dusting of white paint on the pinecone tips gives a frosted look, and a few drops of cinnamon or clove essential oil on the cones keeps the scent going all week.
Because the supplies cost almost nothing, this is a perfect project for little helpers, and it fits right in with kid-friendly decor ideas. Let them hunt for the best pinecones and tie the ribbons.
3. Hand-Poured Soy Candles in Thrifted Jars, Cozy and Reusable
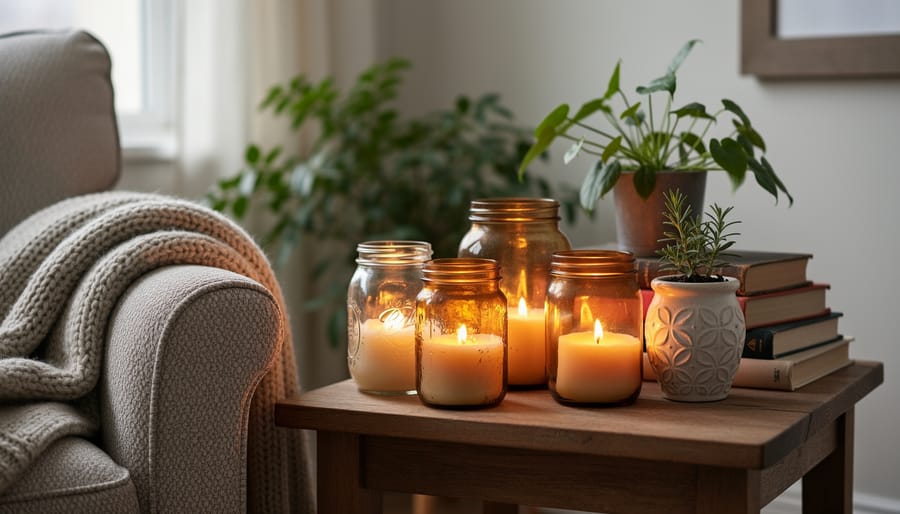
A thrifted teacup or small jar becomes a candle in about an hour. Start by wiping your container clean and checking that it’s heat-safe, with no cracks or chips. Melt soy wax flakes in a heatproof pitcher set over a pot of simmering water, stirring gently until smooth and clear.
While it melts, center a pre-waxed wick in the bottom of each container, securing it with a dab of wax or a wick sticker. Rest a pencil across the rim to keep it straight. Once the wax cools slightly, stir in your scent. Pine feels like a walk in the woods, vanilla is soft and comforting, and a touch of clove adds spice. Pour slowly, then let the candle set undisturbed for several hours.
A quick safety note: never leave melting wax unattended, and keep pets and little ones well clear of the stove and hot pitcher. Use oven mitts and work on a protected surface.
These make a thoughtful handmade gift, and they give old dishes a second life. Add a ribbon and a handwritten tag, and you’re done.
4. Felt Ornament Set, a Gentle Craft for Little Hands
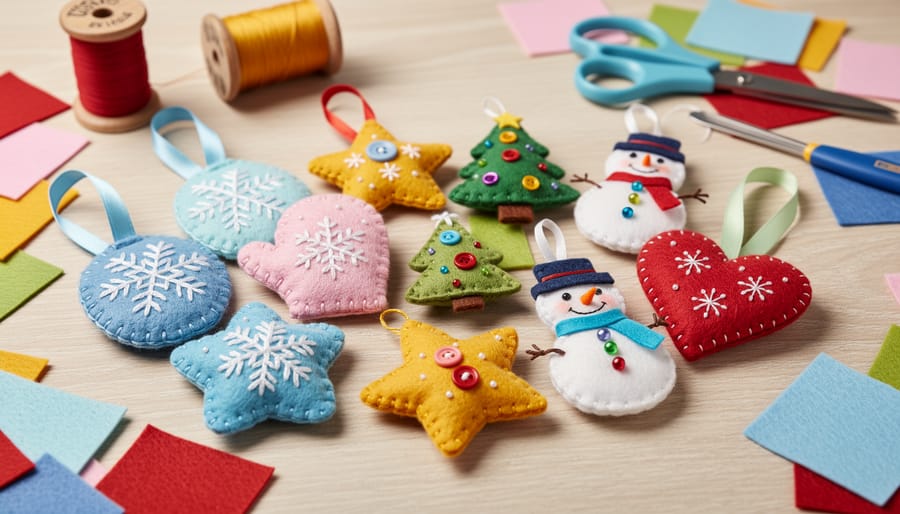
Felt is the friendliest fabric there is. It doesn’t fray, it cuts cleanly with kid scissors, and it comes in colors that look cheerful on any shelf. Start by drawing simple shapes like stars, mittens, and little trees on paper, then trace them onto felt and cut two of each.
No sewing skills needed. Press the two layers together with fabric glue, or use a basic running stitch with a chunky needle and embroidery floss if someone wants to try. Leave a small gap, tuck in a pinch of polyfill for softness, then seal it up and add a loop of ribbon at the top.
The finished pieces work as tree ornaments, gift toppers, or a string of garland across a mantel.
To keep little crafters engaged, give each child a job: tracing, cutting, choosing colors, or stuffing. Set out a tray of sequins and buttons for decorating, and put on some music. Short, silly, and colorful beats perfect every time.
5. Salt Dough Keepsakes, a Family Tradition in the Making
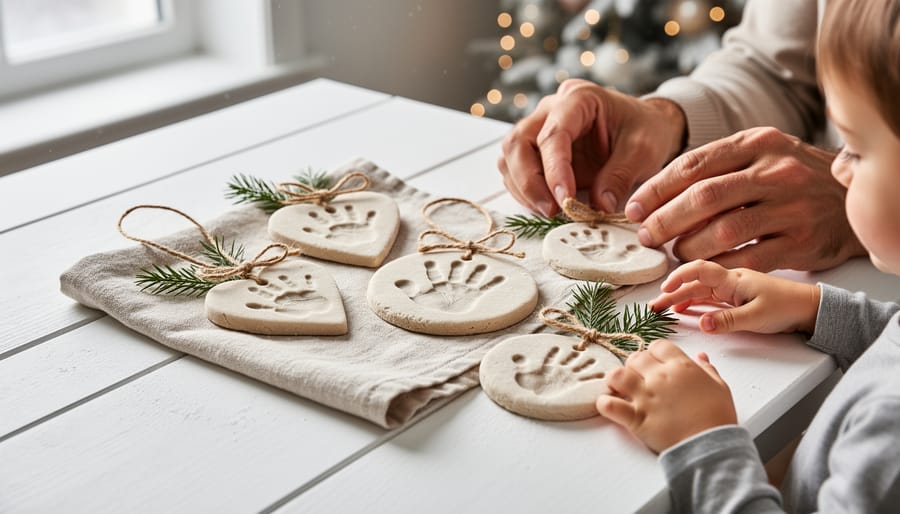
Salt dough is the kind of craft that starts in the kitchen and ends up on the tree. Mix two parts flour, one part salt, and about one part water until it feels like soft play dough, then knead for a few minutes until smooth.
Roll it out to roughly a quarter inch thick and press cookie cutters into it. Stars, hearts, and gingerbread shapes all work well. For keepsakes, press a small handprint into a round, or use a toothpick to write a name and the year. Poke a hole near the top if you plan to hang it.
Bake at 200°F for two to three hours, flipping once, until the pieces are fully hard. Low and slow keeps them from puffing or cracking. Once cool, paint them with acrylics, then seal with a clear coat.
Wrap finished pieces in tissue and store them in a dry, airtight box, away from basements and damp corners. Kept this way, they’ll come out year after year.
6. Simmer Pot Jar Gifts, a Craft You Can Smell

Simmer pot jars are the easiest way to turn a pantry into a gift. You’re layering ingredients into a jar, so there’s no wrong way to do it, and the finished jar looks lovely on a shelf even before anyone uses it.
You’ll need:
– A clean pint or half-pint jar with a lid
– Dried orange slices (the same ones from your garland work beautifully)
– A few cinnamon sticks
– A tablespoon of whole cloves
– A handful of fresh or dried cranberries
Start with the cranberries at the bottom, then tuck in the cinnamon sticks along the glass, add the cloves, and finish with the orange slices on top so they show through the jar. Tie a handwritten tag around the neck with simple instructions: empty the jar into a small pot, cover with water, and simmer on low, topping up the water as it cooks down.
Within minutes, warm citrus and spice drift through the house. If you love kitchen projects, this one sits right between a craft and a recipe, so it’s a natural fit alongside the cozy recipes we share here.
7. Chunky Yarn Wreath, a Renter-Friendly Door Statement
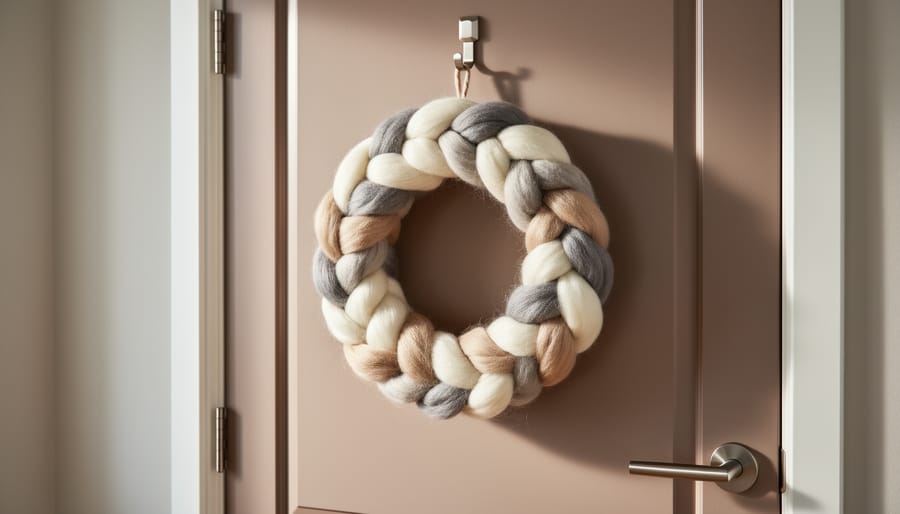
If you rent, a front door can feel off-limits, but a chunky yarn wreath is a lovely workaround. Start with a foam or straw wreath form, and tuck the loose end of your yarn under the first wrap so it stays put. Wind the yarn snugly around the whole ring, overlapping each pass so no form peeks through. Chunky yarn covers fast, so you can finish the wrapping in about an hour.
Then add personality. Glue on a few small pinecones or a cluster of felt leaves near the bottom, off-center, for a relaxed look. Hang it from an over-the-door hook, and there are no nails, no adhesive strips, and no damage to worry about when move-out day comes.
For the color palette, stick to three warm neutrals, such as oatmeal, soft caramel, and a creamy ivory. Pick one of them as your main shade, and use the others as small accents. It keeps the wreath looking polished and lets it stay up well past winter.
8. Paper Snowflake Window Display, a Budget Craft With Big Charm
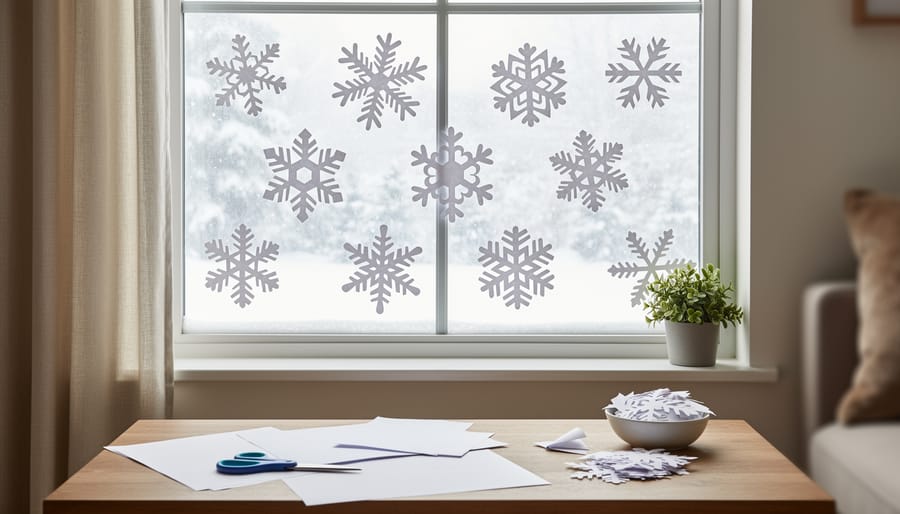
Grab a stack of plain white paper and a pair of scissors, and you’re nearly done shopping. Start with a square sheet (fold one corner to the opposite edge and trim off the extra strip). Fold that triangle in half, then in thirds, so you end up with a narrow wedge. Snip off the tip for a flat top, then cut notches, curves, and tiny triangles along both edges. Unfold gently, and a wintry lace pattern appears.
For cleaner cuts, use sharp scissors and cut slowly, leaving some paper connecting each section so the design holds together. Coffee filters and tissue paper make delicate, airy flakes, while thin printer paper is easiest for beginners. Want something more intricate? Fold the paper into six sections instead of four.
Tape finished snowflakes to windows for a frosty glow, or string them on thread at different lengths for a floating mobile. It’s a lovely rainy-afternoon activity, and these family craft tips can help keep little hands engaged.
Seasonal Craft Questions, Answered
How far ahead should I start seasonal crafts?
Give yourself two to three weeks for slower projects like dried orange garland and salt dough keepsakes, which need drying or baking time. Quick ones like paper snowflakes and felt ornaments can happen the weekend before you want them up.
How do I store finished pieces?
Wrap salt dough and felt ornaments in tissue and keep them in a cool, dry box, since moisture is the enemy. Dried citrus garland lasts longest in an airtight container away from humidity.
Which projects are safest with pets and small kids?
Paper snowflakes, felt ornaments, and salt dough are the gentlest picks. Keep candle pouring and essential oils well out of reach, and remember that small pinecone and clove pieces can tempt curious mouths and paws.
Can I adapt these ideas to other seasons?
Absolutely. Swap the color palette and natural elements, like pastel felt and dried flowers for spring or orange tones and acorns for autumn.
If you’re curious how crafting stacks up financially, our cost breakdown of homemade seasonal decorations shows how little a handmade look can cost, and the same budget-friendly thinking carries over to every project in this list.
Your Cozy Craft Plan, Start to Finish
Eight projects is plenty to choose from, so don’t try to make them all. Pick the one that fits the time you actually have this weekend. If you only have an hour and a pair of scissors, the paper snowflakes are calling. If the kitchen is warm and you’re feeling ambitious, dried orange garland or a simmer pot jar will fill the house with scent while you work.
Gather your supplies first, clear one small corner of the table, and put on something cozy to listen to. That’s really all it takes to get started.
Once you’ve finished your first piece, keep the momentum going. Browse more seasonal craft projects, peek inside our house tours for decorating inspiration, and try a few recipes that pair beautifully with a crafty afternoon.