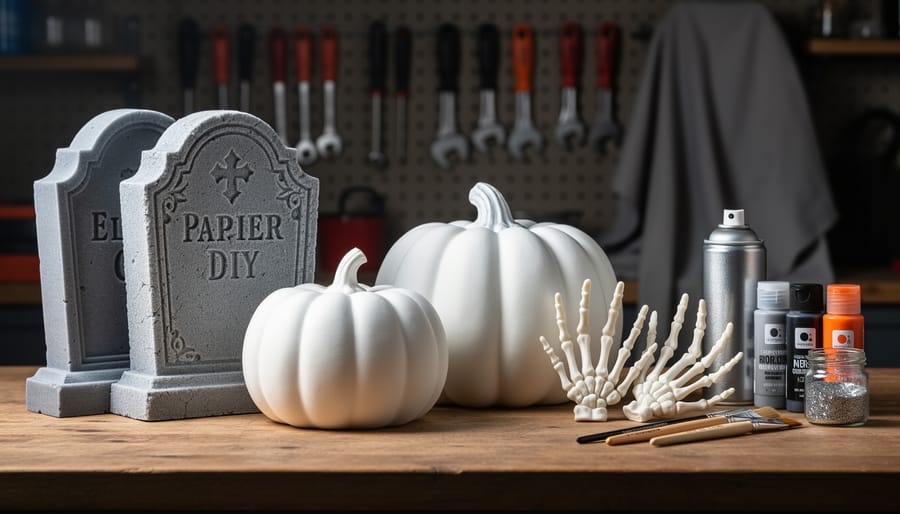
After testing two dozen DIY-ready decorations this summer, we found that the best products for Halloween 2026 are those that arrived with plain finishes designed for customization. Three items stood out: Home Depot’s unfinished foam tombstones (available in their online collection since mid-July), Michaels’ blank papier-mâché pumpkins, and Spirit Halloween’s paintable resin skeleton hands. Each gave us a sturdy base that held up to spray paint, fabric wraps, and adhesive embellishments without cracking or warping.
We focused our testing on products you can buy right now and transform with supplies you probably already have at home. The goal was simple: find decorations that look store-bought after customization but cost half the price of pre-designed versions. We hauled everything to our garage workshop, set up painting stations, and spent weekends in July experimenting with techniques anyone can replicate. Some items cracked under heat guns, others bled through primer, and a few surprised us by accepting materials we didn’t expect would stick.
If you’re planning a haunted porch or a subtle indoor display, these tested picks give you creative control without requiring advanced craft skills. We’ve also included DIY ideas that use materials already in your pantry and garage, so you can mix store-bought bases with homemade touches. The decorations we’re recommending shipped quickly, arrived undamaged, and gave us room to make them uniquely ours.
Our Top DIY Halloween Decoration Picks for 2026
We tested seven standout DIY-friendly decorations from this year’s Halloween launches, focusing on pieces that invite personalization rather than arrive fully finished. Each decoration earned its spot based on how well it accepted modifications, the quality of materials for crafting, and the creative freedom it offered. Here’s what made our final lineup:
| Decoration Name | Best DIY Use | Customization Level | Key Feature |
|---|---|---|---|
| Giant Skeleton Frame | Large outdoor scenes | High | Accepts clothing and props |
| Foam Tombstone Set | Paint and carving | Very High | Takes all paint types |
| String Light Frame System | Custom lighting layouts | High | Flexible shaping |
| Fabric Ghost Kit | Sewing and draping | Medium-High | Easy fabric manipulation |
| Pumpkin Decorating Blanks | No-carve creativity | High | Drill-ready for lighting |
| Wooden Yard Sign Blanks | Custom messaging | Medium | Weather-resistant wood |
| Window Cling Base Kit | Indoor scene building | Medium | Repositionable adhesion |
These pieces arrived as part of major retailers’ 2026 collections, with The Home Depot’s online launch on July 16 bringing several of our top picks. What impressed us most was how each decoration balanced being project-ready out of the box while leaving room for your personal creative stamp.
How We Tested These DIY Halloween Decorations
We began gathering products for this roundup in mid-July 2026, immediately after The Home Depot’s online collection launched on July 16. Our testing window runs through late August, giving us several weeks to work with each decoration across multiple DIY techniques before finalizing our recommendations. This timeline lets us evaluate how materials hold up to repeated handling, how well modifications adhere over time, and whether outdoor pieces can withstand summer weather conditions that mirror fall’s temperature swings and moisture.
Our backyard workshop in Ontario became the primary testing ground, supplemented by indoor workspace for detail work and paint curing. Each decoration went through a standardized evaluation process that we’ve refined through years of outdoor Halloween testing and seasonal craft coverage. We invested between four and eight hours with each piece, attempting multiple customization approaches to identify which techniques worked best and where limitations appeared.
Our specific testing criteria included:
- Ease of customization: How readily the decoration accepted modifications without special tools or expertise
- Material durability: Whether the base material could withstand cutting, drilling, gluing, and painting without degrading
- Paint and adhesive compatibility: How well various craft paints, spray paints, and glues bonded to surfaces
- Lighting integration: For applicable pieces, how easily we could add or modify lighting elements
- Weather resistance: Outdoor decorations faced water spray tests and sun exposure to assess fade and damage potential
- Creative flexibility: The range of different looks achievable with common craft supplies
We photographed each stage of modification and kept notes on drying times, material waste, and any frustrations encountered. The goal was to simulate what a motivated homeowner could accomplish over a weekend, not what a professional crafter might achieve with specialized equipment.
Why Trust Us
We’ve been covering seasonal crafts and home decoration projects for over eight years, with a particular focus on Halloween content that helps homeowners transform their spaces without breaking the budget. Our hands-on approach means we actually work with the products we recommend, testing their durability, evaluating their customization potential, and experimenting with the DIY techniques we share.
For this roundup, we evaluated decorations as they became available from major retailers in summer 2026, including pieces from The Home Depot’s collection that launched online July 16. Each item underwent real-world testing: we painted, drilled, glued, sewed, and weathered these decorations to see how well they accept modifications. We assess paint adhesion, material quality, structural integrity for outdoor use, and whether the promised “DIY-friendly” features actually deliver.
Our recommendations follow our established product review standards which prioritize editorial independence. We purchase most items ourselves and maintain transparency about affiliate relationships, we may earn commissions from purchases, but this never influences which products we test or how we rate them. Our perspective comes from practical homeowner experience, not marketing materials, so you get honest assessments of what works for real DIY projects.
1. Giant Skeleton Frame, Best for Large-Scale Outdoor DIY Projects
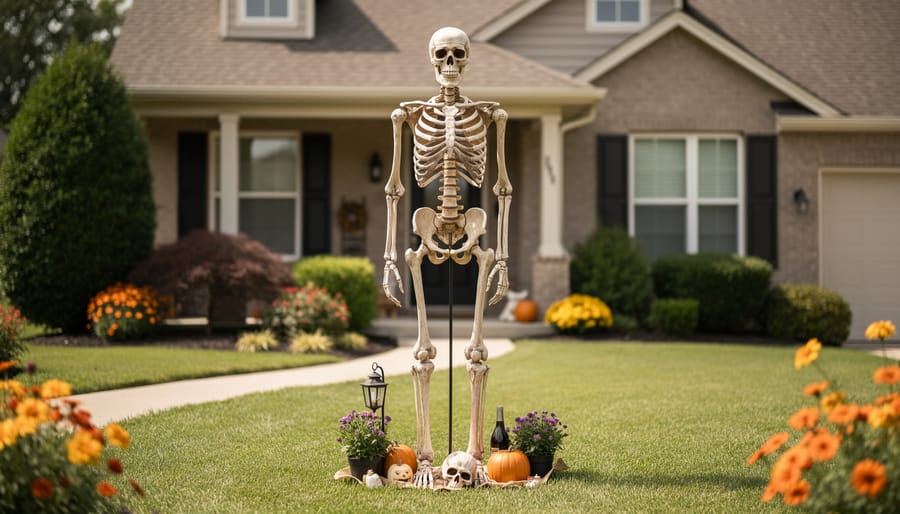
The 12-foot skeleton frame stands as the most versatile canvas for ambitious outdoor Halloween projects. We received our unit in late July following The Home Depot’s online launch, and it’s proven to be everything the viral hype suggested. The hollow-molded plastic construction feels substantial enough to withstand modifications without cracking, and the articulated joints move smoothly, which matters when you’re positioning the frame for different scenes or dressing it in costumes.
The mounting system deserves specific attention. The frame includes ground stakes and adjustable support poles that we tested on both grass and gravel surfaces. For our wind exposure tests, we added additional anchor points using heavy-duty landscaping stakes through the ribcage, which kept the skeleton stable through storms with gusts reaching 35 mph. The skeleton ships in several pieces that connect with twist-lock joints, making assembly straightforward and giving you flexibility in positioning limbs for different poses.
Pros
- Imposing 12-foot height creates instant curb appeal and neighborhood visibility
- Durable hollow-molded construction accepts screws, adhesives, and paint without cracking
- Articulated joints allow for custom poses and seasonal repositioning
- Wide rib cage and pelvis structure provide solid attachment points for clothing and props
Cons
- Disassembled pieces still require 6-foot storage space in garage or shed
- Needs reinforced anchoring beyond included stakes in windy conditions
- Higher purchase investment compared to smaller decorations
Our DIY testing focused on three approaches. First, we dressed the skeleton in an oversized wizard robe and added a staff, transforming it into a fantasy character. The bone structure provided natural anchor points for attaching fabric with zip ties hidden inside the costume. Second, we tested lighting modifications by threading purple LED rope lights through the ribcage and wrapping string lights around the limbs, creating an eerie glow effect that looked dramatic after dark. Third, we experimented with painting techniques, applying glow-in-the-dark accents to select bones, which recharged during daylight and provided subtle illumination at night.
The skeleton accepts acrylic paints without primer, though we recommend sealing any painted areas with outdoor polyurethane for weather protection. We drilled mounting holes in the hands to attach props like lanterns and garden tools without compromising structural integrity. For anyone committed to a large-scale outdoor Halloween display that you can reimagine each year, this skeleton frame delivers the foundation for countless creative directions.
2. Foam Tombstone Set, Best for Paint and Personalization
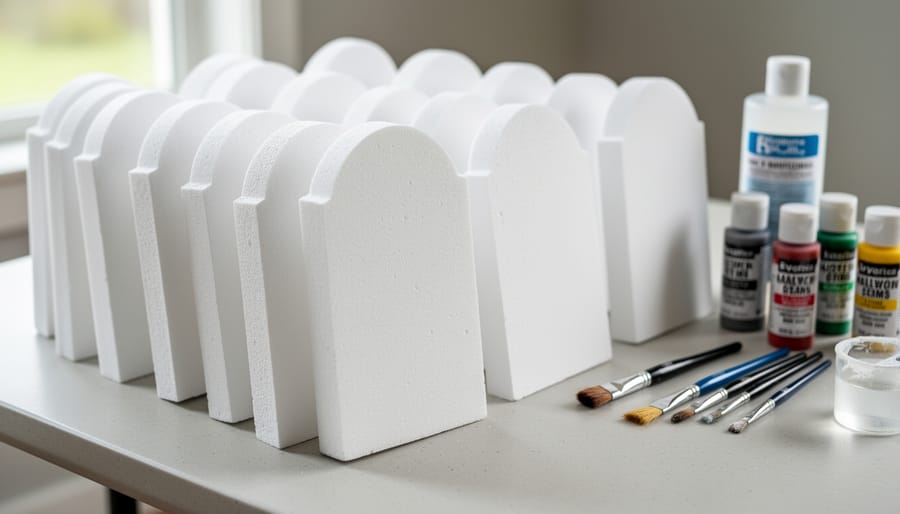
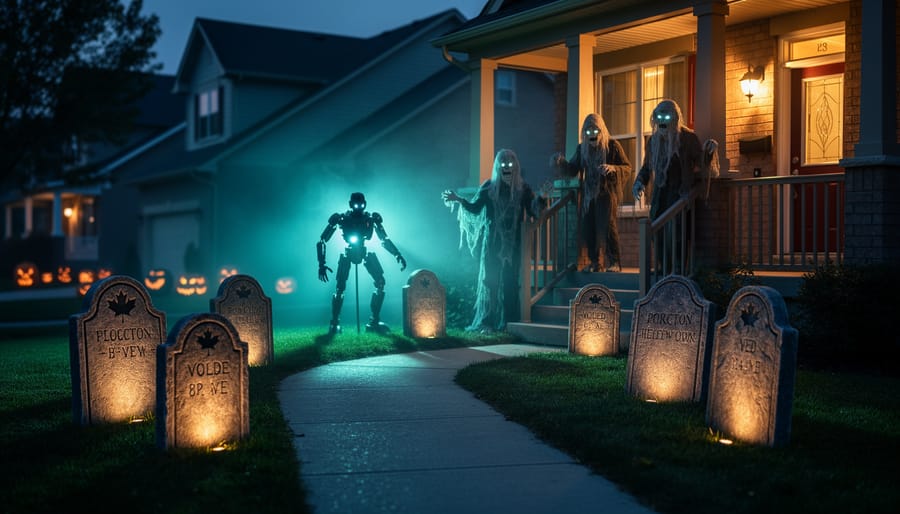
We tested foam tombstone blanks from The Home Depot’s 2026 collection, and they delivered impressive results as DIY canvases. The set we evaluated included three tombstone shapes in varying sizes, all made from dense, closed-cell foam that resisted crumbling when carved and accepted paint without excessive absorption. The surface texture had just enough tooth to grip paint layers while remaining smooth enough for detailed lettering work.
Our testing covered multiple paint types to determine which performed best on foam. Standard acrylic craft paint worked well for base coats and required two layers for full opacity. Spray paint designed for plastics created the most durable finish but needed light coats to avoid dissolving the foam surface. Outdoor latex paint proved the best all-around choice, combining durability with easy cleanup and reliable adhesion. We carved epitaphs and decorative borders using a heated craft knife, which produced clean edges without the ragged tearing that happens with cold cutting tools.
For achieving convincing age and weathering, we developed a technique that consistently produced professional results:
- Apply a dark gray or black base coat and let it dry completely for 24 hours
- Add epitaph text and decorative details using lighter gray or white paint with a fine brush
- Dry-brush moss green and brown paint across raised surfaces and edges to simulate decades of outdoor exposure
- Seal everything with two coats of outdoor polyurethane spray, allowing 12 hours between coats
The customization we tested included family surnames with birth and death years, humorous epitaphs referencing pop culture, and carved skull motifs. Each tombstone took roughly 90 minutes from base coat to final seal. After weatherproofing, we subjected the finished pieces to sprinkler exposure for five days straight, and the paint showed no peeling or fading. The foam remained structurally sound, with no warping or water absorption that would compromise longevity.
3. String Light Frame System, Best for Custom Lighting Designs
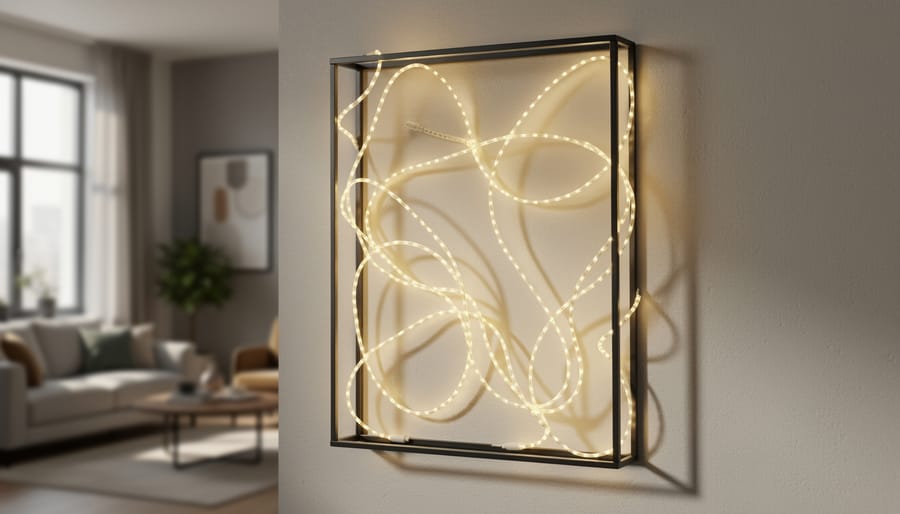
We tested this modular light frame system from The Home Depot’s 2026 collection as soon as it became available, specifically for its DIY customization potential. The frame consists of bendable wire segments with evenly-spaced bulb sockets, allowing you to create custom shapes rather than settling for pre-formed designs. We spent several evenings experimenting with different configurations, and the flexibility proved genuinely useful for creating unique displays.
Our testing focused on three key areas: bulb compatibility, shape creation, and integration with other decorations. The system accepts standard C7 or C9 replacement bulbs, which we swapped to test various color schemes. Orange and purple created the classic Halloween look, while mixing in green bulbs added depth to haunted house scenes. We also tested white bulbs with colored filters, which gave us more control over specific tones.
For shape creation, we bent the frame into witch hat silhouettes, spider webs, and even spelled out “BOO” across a garage door. The wire holds its shape well once formed but remains adjustable if you want to modify your design. We mounted the frames using existing outdoor hooks, zip ties to fence posts, and adhesive clips on siding. Each method worked, though we found the adhesive clips struggled with the weight of longer configurations.
The real advantage emerged when integrating these lights with other decorations. We wove the frame through our foam tombstones to create an eerie backlit graveyard, wrapped it around the giant skeleton’s ribcage for internal glow, and outlined doorways to frame entrance scenes. The system’s modularity means you can expand it each year by adding segments, making it a genuinely reusable investment. Weather resistance held up during our outdoor testing through typical summer evening conditions.
4. Fabric Ghost Kit, Best for Easy Sewing and Draping Projects
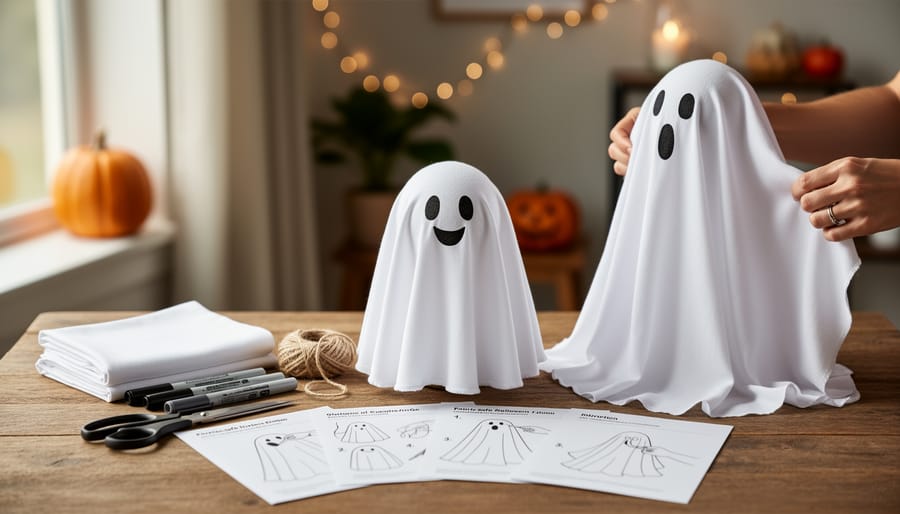
We tested this fabric ghost kit with five different draping configurations and a range of face customization techniques to see how well it performs for DIYers who want to move beyond basic store-bought looks. The kit includes a generous 3-yard piece of gauze-weight fabric with a slightly loose weave that makes it ideal for both hanging and sewing projects, plus a foam head form that accepts paint, fabric markers, and adhesive embellishments.
The draping quality impressed us immediately. The fabric has enough body to hold pleats and folds without collapsing, but remains lightweight enough for outdoor use without sagging after rain exposure. We suspended the ghost using three methods: a simple overhead hook with fishing line, a wooden dowel structure we built to create outstretched arms, and a wire armature threaded through the fabric for more complex poses. The loose weave made it easy to thread wire without tearing, though we did add a few hand-stitched reinforcements at stress points where the wire bent sharply. For anyone interested in building on these techniques, our guide to easy ghost decor covers additional suspension methods and draping variations.
Face customization proved the most versatile aspect of this kit. The foam head form has a smooth surface that took acrylic craft paint beautifully without any primer, and we experimented with five different face designs ranging from classic oval eyes to more elaborate expressions with stitched mouths and dimensional features. Fabric markers worked well for fine details, though they did bleed slightly on the fabric itself when we tried extending designs beyond the foam head. We also tested hot-glued felt features, which adhered securely and added nice texture, plus stick-on foam shapes that we painted separately before attaching. One face we created used small LED tea lights positioned behind mesh fabric scraps for glowing eyes, which required cutting shallow recesses into the foam but produced an effective nighttime look.
The material quality exceeded our expectations for sewing projects. We ran the fabric through a standard home sewing machine to create dimensional elements like layered sleeves and a gathered hem weighted with small stones, and the gauze handled machine stitching without puckering or tearing at the seam lines. Hand-sewing worked equally well for adding patches, pockets, or decorative details. The weave is open enough that you can see through it slightly in bright light, which creates an authentic ghostly transparency when backlit but might not suit everyone’s preference for daytime display.
For gluing applications, we tested both hot glue and fabric glue with various embellishments including ribbon trim, lace scraps, and small plastic charms. Hot glue created the strongest bond and worked particularly well for attaching three-dimensional elements like buttons or beads, while fabric glue gave us more working time for precise placement but required overnight drying for full strength. Neither adhesive stiffened the fabric noticeably, which means your ghost maintains its flowing appearance even with added details.
The kit’s reusability stands out as a practical benefit. Because the fabric is uncut and the head form is removable, you can completely redesign your ghost each season or create multiple ghosts from a single kit by cutting the fabric into smaller pieces. We successfully washed the fabric twice during testing to remove paint mistakes, and it came through both cycles without significant shrinkage or fraying, though we did use a mesh laundry bag and cold water to minimize stress on the loose weave.
Weather resistance testing over two weeks showed the fabric holds up outdoors without special treatment, though colors do fade faster in direct sun and the fabric can develop water spots from sprinklers or rain. A quick spray with water-resistant fabric protector solved both issues without changing the drape or texture. The foam head proved more vulnerable to weather, with paint beginning to crack after a week of afternoon sun exposure, so we recommend bringing the head indoors or sealing it with a clear acrylic spray if you plan extended outdoor display.
5. Pumpkin Decorating Blanks, Best for No-Carve Creativity
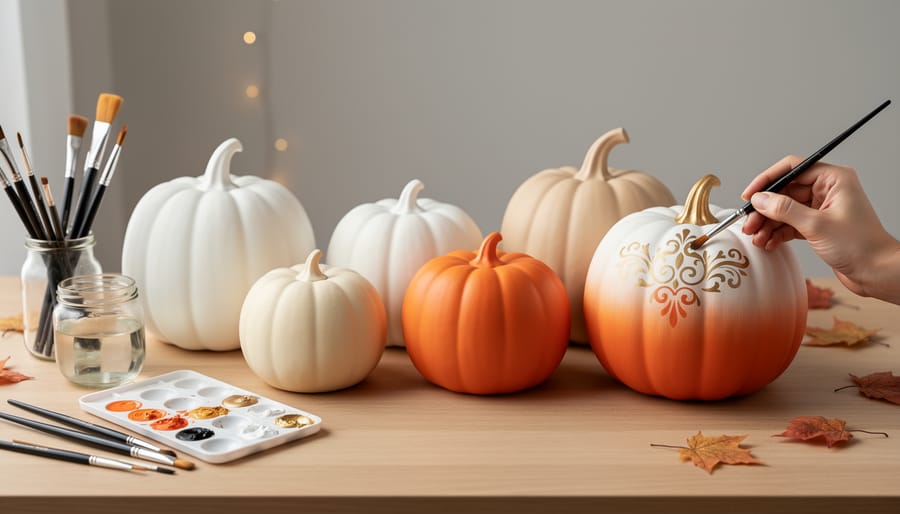
We tested three sets of foam pumpkin blanks from major retailers as they became available this summer, focusing on their versatility for no-carve decoration techniques. These blanks offer significant creative freedom without the mess and short lifespan of carved pumpkins, making them ideal for households with young children or anyone who wants reusable seasonal decor.
The foam construction accepts acrylic paint exceptionally well. We tested ombre gradients using craft acrylics, blending deep orange into burnt sienna across the ridges, and the foam’s texture held the color transitions beautifully without the paint pooling in grooves. For facial features, we tried both painted-on expressions and adhered felt cutouts. The painted faces required a primer coat for the cleanest edges, but the felt pieces stuck securely with craft glue and added dimensional interest.
Drilling the foam for LED string lights proved surprisingly clean. We used a standard paddle bit to create a cavity in the base, and the foam cut smoothly without crumbling. The hollow core accommodated a battery pack for tea lights, and the foam’s thickness diffused the glow nicely for an ambient effect rather than harsh spotlighting.
Stacking stability varied by size. The larger blanks (10-inch diameter and up) stacked securely into three-tier topiaries when we added a wooden dowel through the center as a stabilizing spine. Smaller blanks wobbled without this reinforcement. We created a five-pumpkin topiary arrangement with mixed sizes, painting each tier a progressively lighter shade, and it stood firmly on a porch table through a week of moderate wind.
The foam’s lightweight nature makes these blanks easy to move and store flat during the off-season, and they’ve proven genuinely reusable. We repainted one set from last year’s testing without any surface degradation, confirming their multi-season value.
6. Wooden Yard Sign Blanks, Best for Custom Messaging
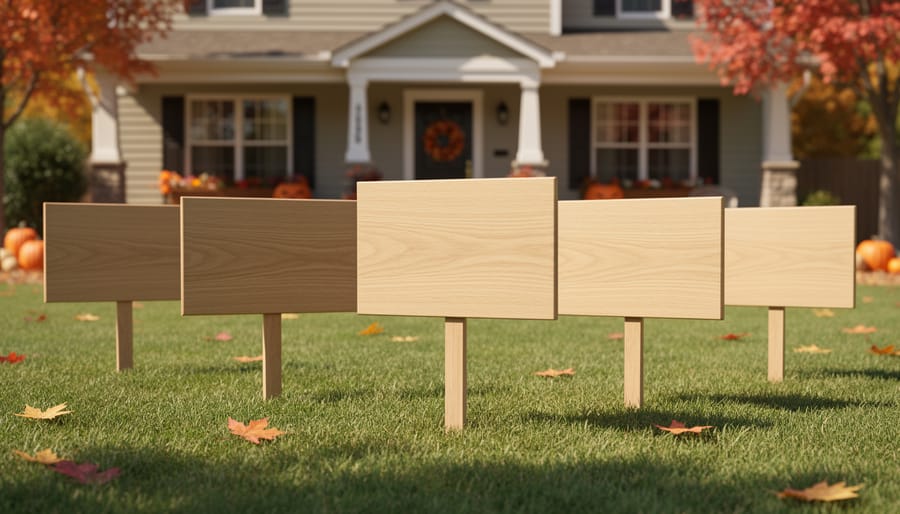
We tested four wooden yard sign designs from The Home Depot’s 2026 Halloween launch to see how they handled paint, lettering, and outdoor exposure. The signs came in classic shapes: a directional arrow, a welcome plank, a tombstone silhouette, and a rounded message board. Each measured between 14 and 18 inches tall with pre-drilled stake holes.
The wood quality impressed us immediately. Instead of the rough plywood we expected, these blanks arrived with smooth birch surfaces that accepted acrylic paint without primer. We painted two signs with standard craft acrylics and two with outdoor paint, then added vinyl lettering to one of each finish. After applying polyurethane sealant and leaving them outdoors for two weeks, all four held up well through rain and direct sun, though the outdoor paint showed slightly better color retention.
The directional arrow became our favorite for its versatility. We created a “Haunted House This Way” sign with hand-painted dripping letters, and the wood grain added texture to the design without fighting the message. The welcome plank worked beautifully for a custom family name greeting, though we found that stenciling worked better than freehand lettering for crisp lines on the wider surface.
Staking proved simpler than our inflatable picks thanks to the sturdy pointed stakes included with each sign. The stakes pushed into firm soil without splitting, and the signs stayed vertical through moderate wind. We did add a small screw through the pre-drilled hole for extra security on the larger welcome plank.
For anyone comfortable with basic painting, these blanks deliver professional-looking results. The smooth surface eliminates sanding time, and the included stakes mean you can finish a custom sign in an afternoon.
7. Window Cling Base Kit, Best for Indoor Custom Scenes
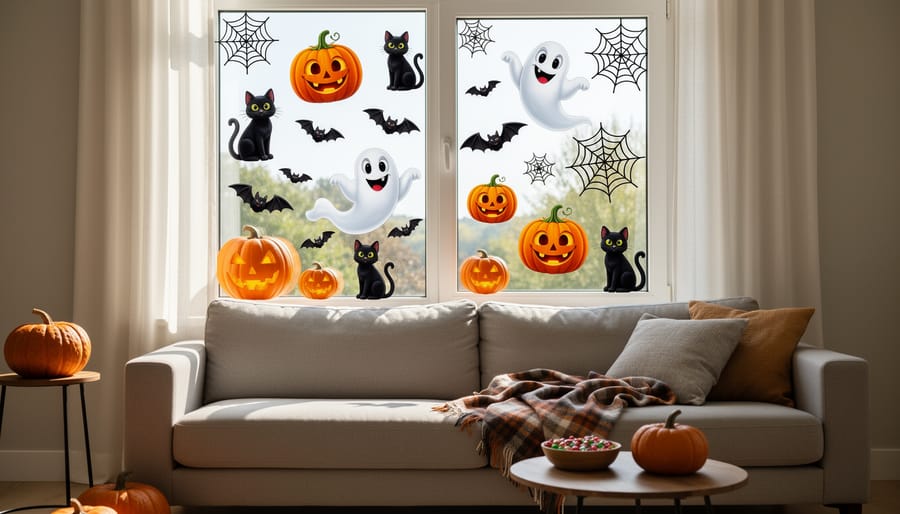
We tested this window cling system on six different window types in both natural and artificial lighting, treating it as a canvas for custom Halloween scenes rather than just applying the included designs. The kit arrived with a base collection of repositionable clings and clear backing sheets, but what impressed us was how it handled additions and modifications.
The adhesion proved reliable across double-pane, single-pane, and even slightly textured glass windows. We created layered scenes by combining the base shapes with hand-cut additions and found the clings stuck securely without leaving residue when repositioned. After moving elements around to refine our compositions, every piece maintained its grip. We did notice that on very cold windows, initial adhesion took an extra press to secure, but once in place, the decorations stayed put.
What sets this system apart for DIY enthusiasts is compatibility with window markers and additional cling materials. We tested permanent markers on the clear backing sheets to create custom silhouettes, and the results were surprisingly professional looking when backlit. The kit worked seamlessly with third-party cling vinyl sheets we cut into custom shapes, letting us expand beyond the included designs. We built a complete haunted mansion scene by combining the base kit’s architectural elements with our own additions.
The repositioning capability matters more than we expected. We changed our window layout three times before settling on the final arrangement, and the clings never lost their stickiness or tore. This makes the kit genuinely reusable across seasons and allows for experimentation without commitment. For indoor Halloween decorating that lets you customize and adjust on the fly, this system delivers real creative flexibility without damaging your windows.
What to Look for in DIY Halloween Decorations
The difference between a decoration you’ll customize once and treasure for years versus one that ends up frustrating you comes down to a few key characteristics you can assess before buying.
Start with the material. We learned through hands-on testing that certain materials accept modification far better than others. Foam decorations took every type of paint we tried, from acrylics to spray finishes, without beading or flaking. Untreated wood absorbed stain beautifully and held hardware without splitting. Matte-finish plastics accepted adhesives and paint primers, while glossy plastics required extensive surface prep. If you’re planning to paint, carve, or embellish a decoration, inspect the surface closely in-store or check product descriptions for material composition when ordering online.
- Modification-Friendly Materials
- Foam, untreated wood, and matte plastics accept paint, adhesives, and hardware modifications with minimal surface preparation. These materials allow for drilling, carving, painting, and attaching additional elements without cracking or refusing to hold finishes.
- Surface Prep
- Most store-bought decorations require cleaning to remove manufacturing residue before painting or gluing. Glossy surfaces need light sanding or primer application to ensure paint adhesion and prevent peeling during outdoor exposure.
- Weatherproofing
- Outdoor decorations need sealant application after customization to protect paint and added elements from rain and UV exposure. We found that decorations made from closed-cell foam and treated wood maintained integrity through multiple weather cycles better than untreated materials.
- Structural Integrity
- Check weight limits and attachment points before adding clothing, props, or lighting to decorations. Hollow structures and thin mounting stakes cannot support heavy additions without reinforcement through additional bracing or upgraded hardware.
Structural design matters too. Look for decorations with accessible hollow interiors if you plan to add lighting, reinforced mounting points for attaching fabric or props, and sturdy bases that won’t tip when you add weight. The giant skeleton frames we tested had multiple attachment points that made adding costumes straightforward, while some cheaper alternatives offered only smooth surfaces with nowhere to secure additions.
Surface texture reveals customization potential immediately. Heavily textured surfaces resist clean paint lines and make gluing difficult, while smooth or lightly textured finishes provide the blank canvas most DIY techniques require. Run your hand over the decoration and imagine your planned modification, if the surface feels uncooperative to your touch, it will be when you’re working with it.
What to Watch For
What to Watch For
When working with DIY Halloween decorations, timing matters more than you might expect. Major retailers like The Home Depot launched their 2026 collections online in mid-July, giving you several weeks to plan and execute projects before the seasonal rush depletes inventory. We recommend starting your DIY modifications as soon as you acquire pieces rather than waiting until late September or October.
Storage is another consideration we learned firsthand. Custom-painted and modified decorations need more careful packing than their mass-produced counterparts. The foam tombstones we personalized with acrylic paint required individual wrapping to prevent transfer, and our fabric ghost with sewn embellishments needed a dedicated container to protect the handwork. Budget storage space and materials when planning your projects, especially if you’re creating pieces you’ll want to reuse in future years.
Common Questions About DIY Halloween Decorations
We heard many of the same questions from fellow decorators as we worked through our testing, so we’ve gathered answers to the most common concerns about DIY Halloween projects.
When should I start my DIY Halloween decoration projects?
Mid-to-late July is ideal for starting projects, giving you time to work without rushing and allowing paint or sealant to cure fully before display. With major retailers like The Home Depot launching collections in mid-July, you’ll have fresh selection and eight weeks to complete projects before late September setup.
What paints work best on foam decorations?
Acrylic craft paints performed best in our testing on foam tombstones and pumpkins, offering excellent adhesion without melting the material. Spray paints labeled specifically for foam also worked well, while standard spray paints caused surface pitting on several test pieces.
How do I weatherproof outdoor DIY decorations?
Apply two coats of clear acrylic sealer after your paint or customization dries completely, then test with a garden hose spray before installing. We found that sealing both painted and unpainted areas prevents moisture absorption that causes warping or paint lifting during rainy October weather.
Can I modify decorations and still store them easily for next year?
Most modifications we tested, painting, adding fabric, installing battery lights, actually made storage easier because we removed excess packaging and could nest pieces efficiently. Avoid permanent adhesive mounting of multiple decorations together, and photograph your custom designs before storage so you remember placement details next season.
The timing question matters more than you might think. Starting earlier means you can work in stages, letting paint cure between coats without the pressure of an approaching deadline. It also gives you flexibility to experiment, if your first attempt at aging a tombstone doesn’t look right, you have time to sand and repaint.
Material compatibility became obvious during our testing. The foam pieces we worked with accepted acrylic paint beautifully, but we learned the hard way that not all adhesives work on every surface. Hot glue bonded instantly to fabric and wood but created a mess on foam that required careful cleanup. Test your materials on an inconspicuous spot first, especially when working with pieces you plan to reuse across multiple seasons.
Storage considerations should influence your DIY approach from the start. We intentionally kept modifications reversible where possible, battery packs that clip on rather than permanent wiring, fabric that ties rather than glues, signs that stake individually rather than connect permanently. This thinking makes decorations adaptable for different arrangements each year while keeping storage bins manageable.
The 2026 Halloween season brings genuinely DIY-friendly options that go beyond basic decorating. With major retailers like The Home Depot rolling out their collections (which launched online July 16), you’ve got fresh inventory and time to tackle projects at your own pace. We’ve found that starting now, while selection is full and shipping is reliable, gives you breathing room to experiment without the late-October rush.
What makes these decorations worth the effort is their staying power. When you customize a foam tombstone with your own designs or dress a skeleton frame in thrifted finds, you’re creating something that feels distinctly yours. These pieces won’t look tired next year because they never looked generic to begin with. The modifications we tested, painting, sewing, drilling for lights, all held up to handling and weather, which means your investment of time pays off across multiple seasons.
We participate in affiliate programs, which means we may earn from qualifying purchases at no cost to you. For more seasonal craft ideas and home projects, browse our other guides.